You are hereHow to Take True-Color Pictures Under LED Grow Lights
How to Take True-Color Pictures Under LED Grow Lights
by Nebula Haze
Table of Contents
Introduction: Getting True-Color LED Pictures
-
Specialized Lenses (which specifically correct LED light)
Introduction: Getting True-Color LED Pictures
LED grow lights are relatively new to the cannabis growing scene, but they offer benefits such as built-in cooling and efficient electricity use.
Personally, I love seeing pictures of cannabis plants under LED grow lights; the purples and blacks make a garden look like it's from another planet. But one of the problems with LED grow lights is it can be difficult for growers to see their plants to diagnose problems. Plus LEDs don't make it easy for you to take true-color pictures of your garden.
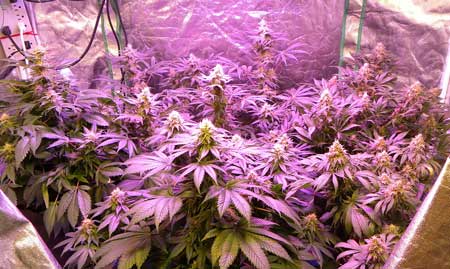
This is a cannabis plant under an LED grow light - everything looks purple and black, and you can't see the plant's natural colors.
So what do you do if you want to take non-purple pictures of your plants under an LED grow light? How can you see your plants in true color so you can diagnose problems?
1.) Best Option: Use Lenses Made to Neutralize Light from LEDs
Special glasses or lenses can be used to neutralize the light coming from LEDs, allowing you to see your plants in true color. If you take pictures or video through these lenses, it will allow you to take natural-color pictures without changing anything else.
This is what a cannabis plant looks like through Method 7's HPS Glasses
Here's a video showing how well these glasses work for an LED cannabis garden
In addition to picture-taking, you can wear Method 7 glasses in the grow room while you inspect your plants. Not only will they help you easily see your plants and spot any potential plant problems, they protect your eyes from bright LEDs too!
Get a pair of Method 7 LED glasses on Amazon.com
Method 7 LED glasses are a bit pricey, but for many growers with bright LEDs, the investment is worth the benefits. If Method 7 are not for you, don't worry, you've still got other options!
Note:I know this tutorial is about photographing cannabis plants under yellow HPS lights, but for growers who are interested, Method 7 also offers a pair of glasses for HPS grow lights.
2.) Take Picture in the Dark with a Flash
During the vegetative stage it lets you clearly see the size and shape of your plant. In the flowering, I belive taking pictures of your plants in the dark with a flash is one of the best ways to get "glamour shots" of your plants in the flowering stage. It really helps you see the buds and glitter as the flash bounces off all the trichomes. It also brings the colors of your plants and buds alive.
Get "Glamour Shots" of your plants by taking a pic in the dark with a flash
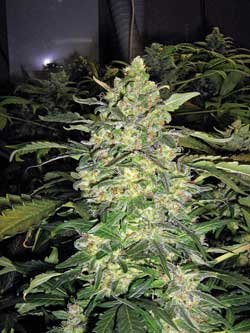
Taking pictures in the dark with a flash lets you see the true colors come to life
This technique shows how big your colas really are since it reflects off the trichomes on the buds
Take these pictures right before lights go on, or immediately after the lights go off. This ensures you don't interrupt the plant's dark period and put it off it's rhythm.
If you step back from the plants, it helps incorporate more natural light and can help give more true color to your plants in pictures. The more natural light you can incorporate, the more natural your plants will look.
Here's examples of photographers stepping back for a little more natural light
The more natural light the better, or simply turn off your LEDs and use just natural light.
Use Camera Settings to help correct the lighting. For example DSLR cameras usually allow you to adjust the white balance so that it corrects for some of the purple.
Sometimes playing with other settings on your camera can make a huge difference. Here are some settings to play with to see if it can help you achieve better pictures.
- White Balance
- Exposure
Jump to...
10 Tips & Tricks for Great Plant Pictures
Learn More about LED Grow Lights
7 Ways to Increase the Quality of Your Buds


